
Article by Acidic
on 12/24/2000.
WARNING: This article is intended for mature readers only. Before attempting this or any other Better Living Through Chemistry article, read up on the subject in question and make sure what you are doing is SAFE and LEGAL. Though I drank this concoction, NOTHING written about here should be considered 100% safe. Muahahahahaha!!!!A Better Living Through Chemistry article on everyone's favorite subject: Alcohol!
Science Can Be FUN!
I know what some of you are thinking: "ANOTHER #$^#ing EDUCATIONAL ARTICLE! BORING!!" You're probably the same people that used to fall asleep in high school science class and then complain when you flunked the exam. Well, here's some news for you: SCIENCE RULES! And in today's lesson, you will find out WHY.
Today's Lesson: How to Make Wine Out of Common Household Items.
You read that correctly! Today, I'll be showing you how to make wine out of common household items. Why is this useful? BECAUSE SOME OF YOU ARE CHEAP BASTARDS THAT WON'T SPEND $15.00 FOR A DECENT BOTTLE OF WINE. Either that or you're having a big party and need massive amounts of cheap alcohol for the punch. Whatever the reason, with a little planning you can make your own CHEAP WINE. Here's how:
Step 1: Gather the Ingredients.
You're probably wondering what exactly we consider "household items" in this article. I mean, if we consider a bottle of vodka and kool-aid household items, this article is going to be pretty short. But we don't. These are the items you will need:
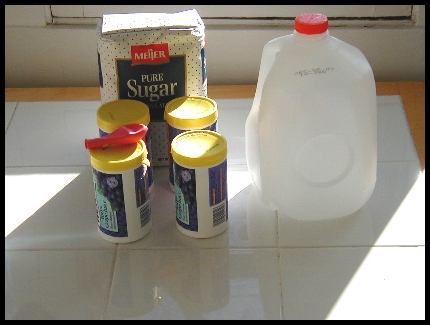
The materials and ingredients we used.
1) 3 cans of 100% frozen grape juice (I use Welch's 100% grape juice concentrate). In total, the cans should make 144 fluid ounces of juice when properly prepared. We aren't properly preparing it, so that number is only relevant in determining how concentrated the juice is. Cost: Roughly $2.00 a can. Total: $6.00.
2) 1/2 cup of sugar. I purchased a huge bag of sugar for $2.00, so I probably only used a dime's worth in this project. You can even steal packets of sugar and use them if you are REALLY, REALLY CHEAP. Just don't try to use a sugar-free sweetener, because it won't work.
3) A 1 gallon container. I use a milk jug because it is free. You can buy an expensive container if you want to, but then why not just spend the money on an expensive bottle of wine instead? CHEAP is the idea here!
4) Balloons. You'll need ONE unless it breaks. These cost a few pennies each, or you can get a bag containing dozens for $1.00.
5) Water. Distilled water is a no-no, but almost any other type that is healthy will do. I use tap.
6) A pin. You'll need to poke a few small holes into the balloon later.
7) Magic Fairy Dust - AKA yeast. We'll talk more about this in a moment. You can purchase packets of baker's yeast at any grocery store. It will run about $0.75 to $1.50, though you will usually get more than one "packet" in a strip.
In addition to these items, I'd also recommend a measuring cup, a rubber band, a siphoning hose (any small, thin piece of tubing will do), and a funnel. You don't NEED these items, but they'll help.
Once you have all of the ingredients, place them together on a table and stare at them. You will be turning these common items into wine very shortly. But first...
A Note About Yeast.
I called yeast "magic fairy dust" earlier because it is what turns grape juice into wine. Without yeast, there would BE NO wine/beer/vodka/tequila/rum/whatever. So the next time you take a sip of alcohol, give thanks to the Big Guy for creating it.
But what is yeast? Specifically, yeast is a fungus that exists everywhere around us. That's right: Fungus. There are many different strains of yeast, but the ones we will be using all have one thing in common: they eat sugar and water and excrete alcohol. Yes, you read that correctly - alcohol is basically fungus piss. Think about THAT the next time you see some attractive member of the opposite sex downing a shot at a bar!
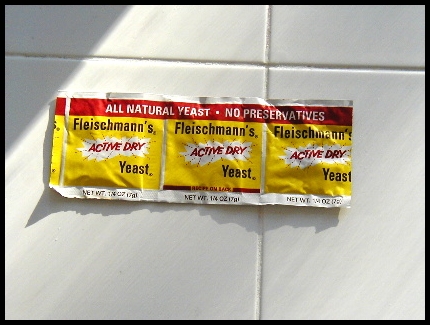
We use one of the three packets of this baker's
yeast in our wine.
But as I said earlier, there are different strains of yeast. Each strain will produce different flavors when used to "ferment" alcohol (what the process of turning "grape juice" and other sugars into alcohol is called). In this article, we use baker's yeast - something most vintners (makers of wine) would NEVER think about doing. Baker's yeast will create a strong taste in the wine that many people do not like, but it IS commonly available. On the other hand...
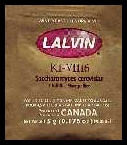
A packet of wine yeast.
..you could also use a yeast specifically FOR winemaking. They run between $0.50 and $1.00 per packet (only slightly more than common baker's yeast), but can usually only be found at a specialty store. Wine yeast WILL improve the flavor of your alcohol considerably, so keep this in mind when brewing future batches.
Step 2: Mix Some Concentrate!
Now thaw the concentrate and POUR IT INTO THE GALLON CONTAINER. Mix in TWO cans of water for each can of concentrate - NOT THREE as the packaging indicates. Because the yeast will eat a lot of the sugar, we need more concentrate than normal juice to make the concoction even remotely sweet. Thus, we use less water.
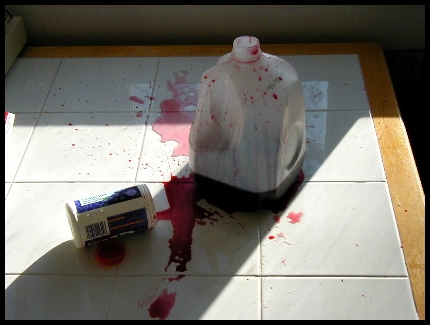
Once all of the juice and water is added, cap the jug AND SHAKE IT UP. Not only does this greatly improve how well-mixed the juice and water are, it will also put air into it. This is called AERATING THE MUST in proper winemaking terminology (the must being the juice). Just FYI.This is what happens when you try to pour the concentrate without a funnel.
Step 3: Add the Sugar.
Dump that 1/2 cup of sugar into the jug with the juice. It is a lot easier if you use a funnel. After that, SHAKE VIGOROUSLY WITH THE CAP ON. Don't let the sugar settle at the bottom, or else there may be flavor problems later.
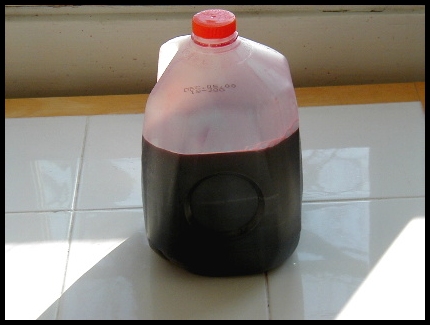
The concentrate, sugar, and water have all been
added.
Step 4: Prepare and Add the Yeast.
Preparing and adding the yeast is more complex than just ripping open a packet and dumping the powder into the juice. If you want the yeast to work properly, you need to HYDRATE it first. Follow the directions on the package in order to do this properly. If you're too lazy to follow them precisely, just pour some warm water into a cup and then dump the powder into it. DO NOT STIR the yeast right away - For best results, give it time to hydrate on its own before messing with it.
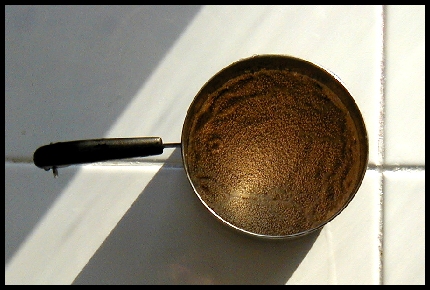
The dry yeast begins to hydrate.
Once the yeast is completely hydrated, add a few spoonfuls of sugar and stir. How will you know when the yeast is hydrated? It will look like this:
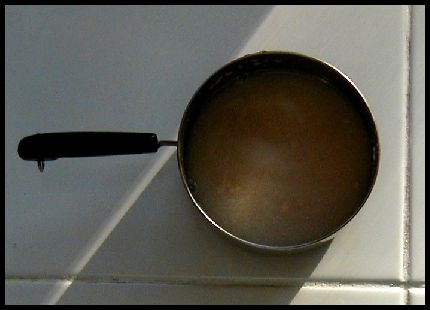
The yeast is now MOSTLY hydrated.
Wait for the yeast to foam up. And when I say "foam up," I mean FOAM! It is not uncommon for the yeast to foam up at least an inch. Pour the yeast into the juice once this happens and again SHAKE VIGOROUSLY WITH THE LID ON. Quickly move on to the next step once the juice and yeast are properly mixed.
Here's an activity that may make a few readers nervous: Get a pin and put 3-10 holes in the top of the balloon. These holes will allow the gases the fermentation process creates to escape, but are so small that they will mostly close when the pressure of fermentation decreases.
Once the holes are made, pull the balloon around the top of the OPEN gallon container. You don't need the lid for a while, but make sure to keep it around so that you can securely "seal" the finished wine in a few weeks.
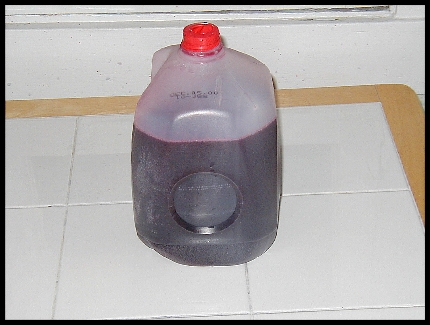
A properly closed jug of grape juice begins its
transformation.
When placing the balloon around the opening, do your best to push it "down" into the container. It shouldn't stick up.. YET. If you want to make sure the balloon doesn't pop off during fermentation, place a rubber band around the bottom of it or tape it to the jug. Tying it with string also works.
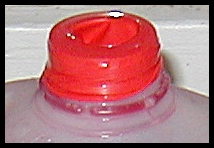
Notice how the balloon is hanging downward?
Congratulate yourself! Once the balloon is on, you've completed your part of the deal! Make sure the jug is in a warm place where it will not be disturbed and LEAVE IT ALONE.
Now It Is Time To Play.. THE WAITING GAME!
Probably the hardest part of this whole process is allowing the yeast to do their work of convert the sugar to alcohol. How will you know if the little guys are doing their job? Within 12 hours, VISIBLE and AUDIBLE signs of fermentation should appear. These include seeing small bubbles rising inside the container and hearing a hissing sound. Even more obvious should be the balloon.
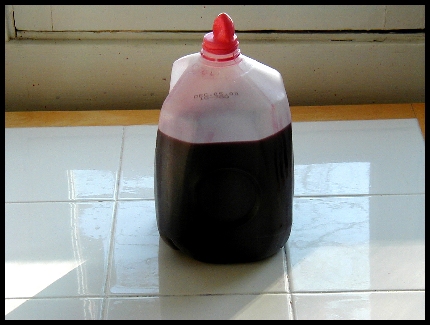
See the balloon? Fermentation has begun to occur
in this jug.
When the balloon begins to inflate, you know the yeast is working! If it hasn't started to inflate within 24 hours from the time you poured in the yeast, the fermentation has probably stalled and you need to try adding new yeast.
It usually takes between one and two weeks for primary fermentation to stop. You'll know this has occurred when the balloon deflates considerably. Place the jug into a cool place like a refrigerator at this time. Also, put the cap back on the jug once the balloon deflates almost completely. These two steps will protect your alcohol's flavor, especially if you don't drink it right away.
Once primary fermentation has stopped, the alcohol content should be sufficient for you to get a good buzz from the wine. If you want to improve the taste, though, you'll need to let it sit for a month or two before drinking it. If you REALLY want it to taste good, transfer it from the current container (called a "fermentor") into another container, making sure to leave all of the gunk on the bottom in the previous vessel. This gunk, called "sediment" or "dregs" by most, is primarily made up of yeast cells that have died from alcohol poisoning (you try swimming around in your own urine for a while and see what happens!). Though usually not poisonous (at least not any more poisonous than alcohol normally is), they give the wine an odd flavor. To get the wine out without disturbing the dregs too much, siphon the wine out. Siphoning just means you take a hose and suck the wine from one container to another, leaving a lair of wine and sediment behind. If you don't want any saliva to contaminate the wine, rinse your mouth out with Listerine or vodka prior to siphoning and then use an aluminum foil tip on the end of the hose. Pull the foil OFF of the hose just before the wine gets to it and you should be fine.
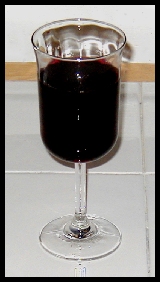
And the Results Are...
By the end of this process, you should have the equivalent of two VERY drinkable bottles of wine for the low-low price of about seven dollars (that's three dollars and fifty cents a bottle). Sure, you can get wine CHEAPER than this at some stores, but it is usually REALLY BAD wine that has the alcohol content of tap water. If you want to lower the price even more, you can try adding less juice and more sugar, or use a cheaper brand of juice. With science, the possibilities are limitless!
BONUS: CHEAPER ALCOHOL!
I hear you! I hear you! There's still one person out there saying, "But I STILL CAN'T AFFORD $3.00 a bottle for wine when I have a party.. especially since it gets turned into punch!" WTF? How can you NOT afford that and still have a party? Well, I've got you covered with this formula for FLAVORLESS WINE.
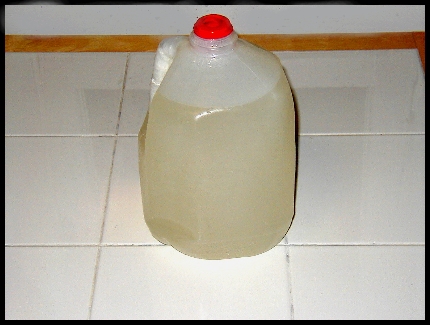
A jug of sugar water awaits its transformation
into "sugar wine."
For this project, you'll need ALL of the equipment previously mentioned. The ingredients, though, have changed - you no longer need grape juice concentrate. Instead, you'll need THREE AND A HALF CUPS OF SUGAR. If you buy the really big bag of generic sugar at the store, this comes out to about $0.35 worth of sugar. Of course, you could always STEAL that much sugar from some restaurant, but you'd probably be arrested for trying to walk out with all of those packets stuffed in your pockets. Take it from me - I've seen old women try it, and it usually doesn't work out.
Moving on: Take the sugar and pour it into the gallon container. Add 14 cups of water and continue the process exactly as you did before. The results should be a mostly flavorless "sugar wine" with similar alcohol content to grape wine. This, however, has the equivalent cost of $0.18 a bottle. Though not particularly tasty, this stuff is perfect for mixing with kool-aid and other drinks to form "party punch." If you're a REALLY cheap host, this is the way to go.
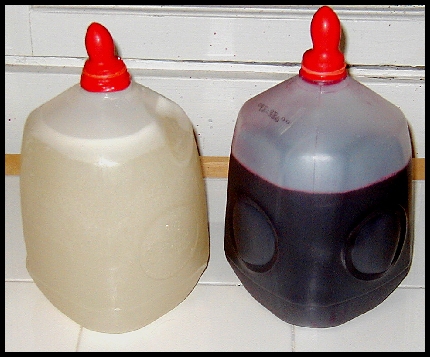
Our two jugs of future wine make their journeys
side-by-side.
Related Links:
Homebrew Heaven: For those interested in making their own wine and beer but actually doing a good job, this on-line store provides you with everything you need.! http://www.homebrewheaven.com.
Home Winemaking Manual: A home winemaking manual I saw on the web that people can use free of charge. http://home.att.net/~lumeisenman/.
rec.crafts.winemaking: This newsgroup is devoted to winemakers (vintners) and their art. If you have a question, need a recipe, or just want to tell a winemaking story, this is the place to go. news:rec.crafts.winemaking.
The Wine Institute's LAW Section: Various laws concerning wine, including where (and how) it can be legally shipped. http://www.wineinstitute.org/winelaw_home.html.
Amazon.com shopping:
![]() The
Joy of Home Winemaking. A beginner's book designed to advance new vintners
(those who make wine) in the basics. It is easy to follow and has a number
of good recipes to get you started.
The
Joy of Home Winemaking. A beginner's book designed to advance new vintners
(those who make wine) in the basics. It is easy to follow and has a number
of good recipes to get you started.
![]() The
New Complete Joy of Homebrewing. This is THE MOST RECOMMENDED STARTING
BOOK for brewers (those who make beer and ale). This book is NECESSARY
READING if you want to try your hand at making something better than Coors
Light to drink.
The
New Complete Joy of Homebrewing. This is THE MOST RECOMMENDED STARTING
BOOK for brewers (those who make beer and ale). This book is NECESSARY
READING if you want to try your hand at making something better than Coors
Light to drink.
![]() Brew
Chem 101 : The Basics of Homebrewing Chemistry. More for those making
beer than wine, this book never the less goes into great detail about what
alcohol is, how yeast works, and the "chemistry" involved in creating alcohol.
A must for frat boys that are chemistry majors.
Brew
Chem 101 : The Basics of Homebrewing Chemistry. More for those making
beer than wine, this book never the less goes into great detail about what
alcohol is, how yeast works, and the "chemistry" involved in creating alcohol.
A must for frat boys that are chemistry majors.